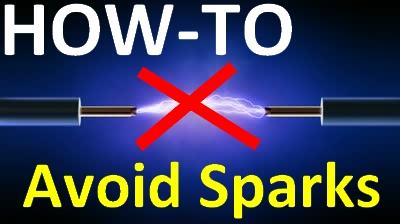
Description of the problem to solve:
When a high enough current switching (transition to/from an on/off state) occurs in an electrical circuit, an electrical arc will form between the two switching contact surfaces, in order to oppose (resist to) this circuit change in current.
The more inductance and/or capacitance in the circuit, the bigger the electric spark will be. Capacitors can be viewed as current storage devices (with a full or empty status, like water reservoirs) : when connecting a battery on an emtpy capacitor (e.g. an ESC), the maximum amperage the battery can deliver will flow into the circuit in a very short time to fill the capacitors (until the capacitors are full), producing a spark in the meantime.
This phenomenon is thus more severe when there is more total capacitance in the circuit. This is an issue with multicopters that have lots of capacitors in their power circuit : minimum 4 ESCs (for quads) and up to 8 ESCs (for octocopters), each ESC having multiple big capacitors.
The phenomenon is also more severe when the battery has a higher voltage (4S-> 5S-> 6S), simply because a higher voltage makes it easier to ionise a thin layer of air between the two switching contacts, as required to produce a spark.
Why should we avoid sparks ? to avoid damage to UAV's battery connectors (gold plated contact areas are damaged by repeated sparks, the plastic of the connectors will be burned, etc). Some sensitive electrical circuits do not like short bursts of high currents. For example, from experience, an attopilot (voltage and current sensor) circuit has been damaged by repeated sparks using a 6S battery....
Solution to the problem:
The solution is theoritically simple : capacitors have to be charged slowly (e.g. with a small current) before connecting the full amperage power of a battery to the ESCs circuits.
Many previous blog posts on diydrones & rcgroups have mentioned various solutions. The one described below synthesizes how to use an interesting circuit : a BTS555 integrated circuit,
 As described in its datasheet, its applications are:
 The two last bullet points, in particular, are the ones that interest us the most.
This BTS555 IC summary is given in the following datasheet extract:
 We see from this datasheet table that a BTS555 will support a current load of 165 amps ! This is more than enough for a large multicopter. It operates up to 34V which is fine for up to 8S batteries.
From the datasheet we get the following pinout description:

 In our application, only Pins 1, 2 and 5 will be used.
Pin 3 will not be used as it is replaced by the IC tab (for high current uses).
Pin 4 will not be used as we do not need to measure the current in our application (rather, a 3DR power module or an Attopilot would be used for that purpose)
How does this work ?
This BTS555 IC is connected between the battery leads and the power distribution board's leads. A small mechanical switch (for example a sliding switch. This switch interrupts a very small current, so no spark issue there) must be used to activate ON or OFF this circuit.
Here is the step by step process to power your multicopter using this circuit (assuming everything has been wired up as described below):
-Connect the BTS555 circuit to the power input leads of your power distibution board
-Ensure the activation switch is on its OFF position
-Connect the battery leads to the BTS555 circuit
-Activate the BTS555 circuit by flipping its switch to the ON position. Your mutlicopter receives now full power from the battery and the spark is avoided.
-If you use a double battery power feed on your drone, follow this same procedure when connecting a first battery. Then connect simply the second battery (no spark will be produced because all capacitors were loaded when the first battery was connected). You can then, optionally, remove the BTS555 circuit from the drone (to remove weight and to not depend on its reliability during flight. Simpler is better and more reliable)
How to wire everything up ?
As reliability is critical in flying multicopters, therefore to not depend on only one BTS555 circuit, the wiring scheme below uses two parallel BTS555 ICs...
The input and outputs of the overall circuit are XT90 connectors (safer than XT60 connectors for bigger multicopters). The elements (ICs, connectors) are soldered on a piece of PCB protoboard. XT90 connectors are soldered directly on each side of this PCB (more compact, no extra wires).
The wiring scheme is the following (for clarity, one side of the protoboard is used as a shared ground plane; the other side is the positive side divided in two zones: the top side where the IC tabs are soldered together and to the battery +Vin. Then the bottom side where pins 1,2 and 5 are soledred together and to the positive PDB output connector, but not to the TAB zone !) :
 Concrete realisation :
 This circuit has been tested succesfully on octocopters (8 ESCs) , 6S batteries with APM, Pixhawk, Attopilot module.